INTRODUCTION:
Every summer, millions of American homeowners turn on their AC for the first time in months — and discover it isn’t working properly. A refrigerant leak, a clogged condenser, a dirty filter — problems that could have been caught in 30 minutes of simple preparation end up costing hundreds or even thousands of dollars in emergency repair bills.
The good news is that preparing your AC for summer is straightforward, takes less than an hour, and can be done without any special tools or technical knowledge. A little preparation in spring means a cool, comfortable home all summer long — and a system that lasts years longer than one that’s neglected.
This complete checklist covers everything you need to do before you turn your AC on for the season — from the simple tasks any homeowner can handle to the warning signs that tell you it’s time to call a professional.
H2: When Should You Prepare Your AC for Summer?
The ideal time to prepare your AC for summer is 4 to 6 weeks before you expect to need it — typically late March to early April in most parts of the United States. This gives you enough time to identify any problems and schedule a repair before the summer rush, when HVAC technicians are booked out weeks in advance and prices are higher.
Don’t wait until the first hot day to turn your system on. By then every HVAC company in your area will be flooded with calls from people whose systems failed on the same day — and you’ll be waiting in a hot house for days.
H2: Step 1 — Replace Your Air Filter
The first and most important thing to do before summer is replace your air filter. After sitting idle all winter your filter is likely clogged with dust, pet dander, and debris that accumulated during heating season.
A clogged filter going into summer means your AC has to work harder from day one, your energy bills will be higher, and your system is more likely to break down during peak heat.
Replace it with a MERV 8 pleated filter for the best balance of air quality and airflow. If anyone in your home has allergies a MERV 11 or MERV 13 filter will trap more pollen and allergens during spring and summer months.
Write the installation date on the filter frame and plan to check it every 30 days throughout summer — during peak cooling season filters clog faster than usual.
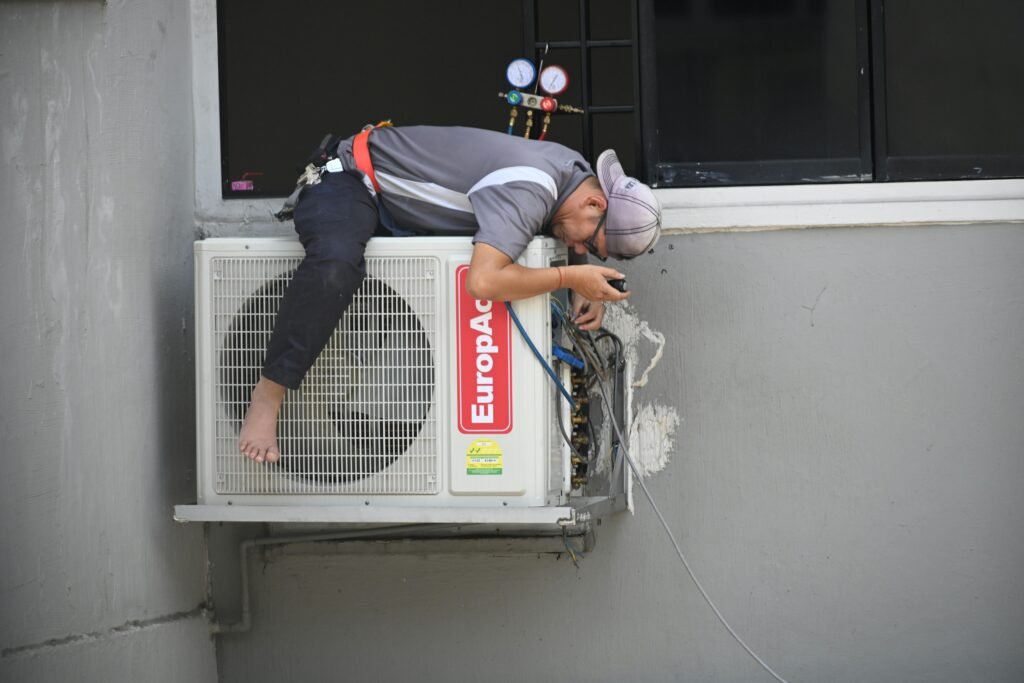
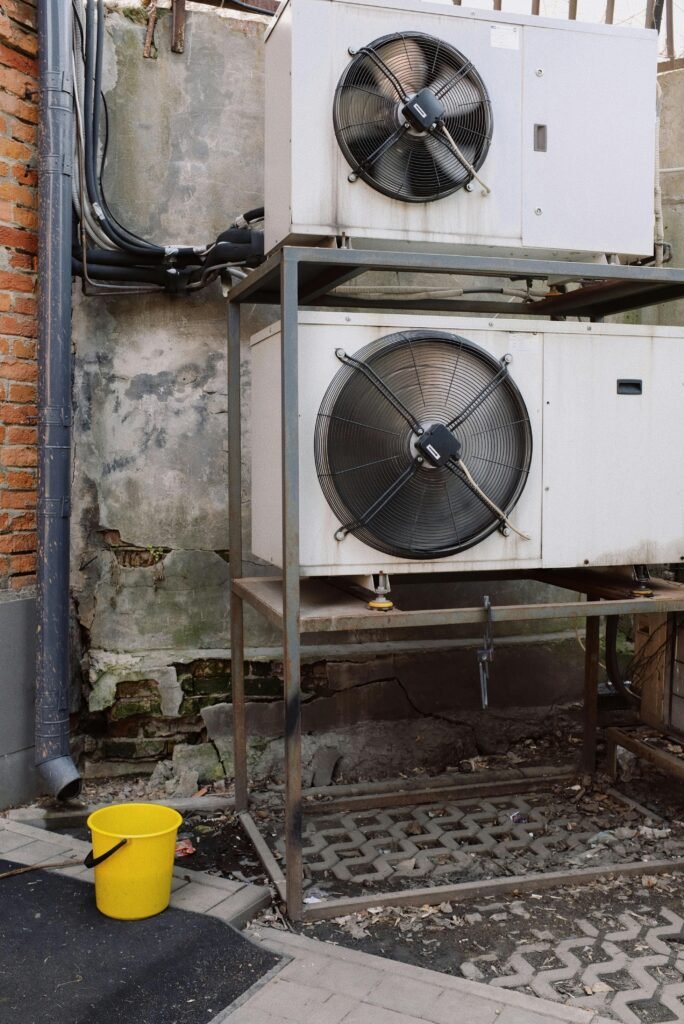
H2: Step 2 — Clean the Outdoor Condenser Unit
Your outdoor condenser unit sits exposed to the elements all year. Over winter it collects leaves, dirt, twigs, grass clippings, and debris that restrict airflow and reduce efficiency. Cleaning it before summer is one of the highest impact things you can do for your system’s performance.
Here’s how to clean it safely:
Turn off the power first. Locate the outdoor disconnect box near your condenser unit — it’s usually a small grey box mounted on the wall nearby. Open it and pull out the disconnect block to cut power completely. Never work on the condenser with power running.
Remove large debris by hand. Pick out any leaves, twigs, or visible debris from the top and sides of the unit.
Vacuum the fins. Use a soft brush vacuum attachment to gently clean the metal fins on the sides of the unit. These thin metal strips are delicate — never use a stiff brush or you’ll bend them and restrict airflow.
Rinse with a garden hose. Spray water gently from the inside out through the fins to flush out embedded dirt. Never use a pressure washer — the high pressure bends the fins and can damage internal components. A regular garden hose on a gentle setting is all you need.
Clean around the unit. Trim back any vegetation growing within 2 feet of the condenser. Plants, shrubs, and grass restrict airflow around the unit and reduce its efficiency significantly.
Let it dry completely before restoring power — at least 30 minutes on a warm day.
H2: Step 3 — Check and Clean the Indoor Evaporator Coil
The evaporator coil sits inside your air handler and is responsible for actually cooling the air that circulates through your home. Over time it collects dust and grime that acts as insulation, reducing its ability to absorb heat and cool your home effectively.
Checking the evaporator coil requires opening your air handler cabinet — usually secured with a few screws. Once open, shine a flashlight on the coil. It should look like a clean metal radiator. If it’s visibly dirty or coated in dust it needs cleaning.
For light dust buildup you can use a can of compressed air to blow debris loose and then vacuum it up. For heavier buildup a no-rinse evaporator coil cleaner spray — available at most hardware stores and on Amazon — is the easiest solution. Spray it on, let it foam up, and the foam carries the dirt into the drain pan as it liquefies.
If the coil looks frozen, bent, or has visible damage, stop and call a professional.
H2: Step 4 — Clear the Condensate Drain Line
Your AC removes humidity from the air as it cools your home. That moisture collects in a drain pan and flows out through a condensate drain line — typically a PVC pipe that drains outside or into a floor drain.
Over winter this drain line can develop algae, mold, and blockages that cause it to back up during summer. A blocked condensate drain is one of the most common causes of water damage from AC systems — when the drain backs up the pan overflows and water leaks into your ceiling, walls, or floor.
Preventing this takes about 2 minutes. Find your condensate drain line — it’s usually a white PVC pipe near your indoor air handler. Pour a cup of white distilled vinegar directly into the drain line access point. The vinegar kills algae and mold and keeps the line flowing freely. Do this every 90 days throughout summer.
If your drain line is already blocked you’ll need to use a wet/dry vacuum to suck out the blockage from the exterior end of the pipe.
H2: Step 5 — Test Your Thermostat
Before the heat arrives test your thermostat to make sure it’s communicating correctly with your AC system.
Set your thermostat to cooling mode and lower the temperature 5 degrees below the current room temperature. Within a few minutes you should hear the outdoor condenser unit start up and feel cool air coming from your vents.
If the system doesn’t respond check these things in order:
- Replace the thermostat batteries — dead batteries are the most common cause of thermostat failure
- Check that the thermostat is set to “Cool” not “Heat” or “Fan Only”
- Check your circuit breaker for a tripped breaker on the AC circuit
- Make sure the disconnect switch at the outdoor unit is in the on position
If none of those fix it your thermostat may need replacement. A basic programmable thermostat costs as little as $35 on Amazon and is a straightforward DIY replacement for most homeowners.
H2: Step 6 — Check Your Vents and Registers
Walk through every room in your home and check that all supply vents and return air registers are open and unobstructed. It’s common to find furniture, rugs, or curtains blocking vents — especially in rooms that weren’t used much over winter.
Blocked vents create pressure imbalances in your duct system that reduce efficiency and can cause your system to work harder than necessary.
While you’re checking vents look for any that are bent, damaged, or showing signs of rust. Damaged vents reduce airflow and can rattle annoyingly when the system runs. Replacement vent covers are inexpensive and easy to swap out.
H2: Step 7 — Inspect Your Ductwork for Leaks
The US Department of Energy estimates that the average home loses 20 to 30 percent of its cooled air through leaks and gaps in ductwork. That’s a massive efficiency loss that shows up directly on your energy bill every month.
You can do a basic duct inspection yourself. Turn your system on and run your hand along accessible ductwork in your attic, basement, or crawl space. Feel for air blowing out of joints, connections, or seams where it shouldn’t be. You can also hold a lit incense stick near duct connections — if the smoke moves erratically there’s air leaking out.
Small leaks can be sealed with HVAC metal tape — not regular duct tape which dries out and fails quickly. For larger leaks or ducts in hard to reach areas consider having an HVAC technician do a professional duct test and seal.
H2: Step 8 — Check Your Refrigerant Level
Refrigerant is the substance that makes your AC actually cool the air. Unlike oil in a car your AC doesn’t consume refrigerant — it operates in a closed loop. So if your refrigerant level is low it means there’s a leak somewhere in the system.
You cannot check or add refrigerant yourself — it requires EPA certification and specialized equipment. But you can watch for the warning signs of low refrigerant before summer:
- AC runs but doesn’t cool effectively
- Ice forming on the refrigerant lines or evaporator coil
- Hissing or bubbling sounds from the refrigerant lines
- Higher than normal energy bills with reduced cooling
If you notice any of these signs schedule a refrigerant check with an HVAC technician before summer. Catching a refrigerant leak in spring is far cheaper than an emergency call in July.
H2: Step 9 — Schedule a Professional Tune-Up
Even if you complete every step on this checklist a professional AC tune-up every one to two years is worth the investment. A qualified technician can check things you can’t — refrigerant pressure, electrical connections, capacitor health, and compressor performance.
Most HVAC companies offer spring tune-up specials ranging from $75 to $150. Book early — by May most companies in warm climates are fully booked for weeks. Scheduling in March or early April gets you the best availability and often the best price.
A tune-up extends your system’s lifespan, maintains your manufacturer warranty in many cases, and gives you peace of mind going into the hottest months of the year.
H2: Summer AC Preparation Checklist — Quick Reference
Use this checklist every spring before turning on your AC:
- Replace air filter with fresh MERV 8 or higher filter
- Clean outdoor condenser unit — remove debris and rinse fins
- Inspect and clean indoor evaporator coil
- Flush condensate drain line with white vinegar
- Test thermostat — replace batteries and verify cooling mode works
- Check all vents and registers are open and unobstructed
- Inspect accessible ductwork for leaks
- Watch for refrigerant leak warning signs
- Schedule professional tune-up if not done in the past two years
H2: Frequently Asked Questions
Q: How long does it take to prepare my AC for summer? Most of the steps on this checklist take less than an hour total for a typical home. The outdoor condenser cleaning takes the most time — about 20 to 30 minutes. The rest are quick checks and simple maintenance tasks.
Q: Do I need to remove my AC cover before summer? Yes — absolutely. If you installed a cover on your outdoor condenser unit over winter remove it completely before turning the system on. Running your AC with the cover on will burn out the compressor within minutes.
Q: My AC was working fine last summer. Do I still need to do this? Yes. Even a system that worked perfectly last summer can develop problems over winter. Pests sometimes nest in condenser units, drain lines develop algae, and capacitors degrade over time. A quick spring checkup catches small problems before they become expensive ones.
Q: How do I know if my AC needs refrigerant? The most common signs are reduced cooling performance, ice forming on the refrigerant lines, and a hissing sound near the indoor or outdoor unit. Only a licensed HVAC technician can measure and add refrigerant — it’s not a DIY task.
Q: What temperature should I set my thermostat to in summer? The US Department of Energy recommends 78°F when you’re home and 85°F when you’re away or sleeping for the best balance of comfort and energy savings. A programmable or smart thermostat makes managing these temperatures automatic.
Q: How can I reduce my AC energy bill this summer? Beyond regular maintenance the most impactful things are using a programmable thermostat, keeping blinds and curtains closed during peak sun hours, sealing gaps around doors and windows, and running ceiling fans to supplement cooling. Ceiling fans make a room feel 4 degrees cooler without reducing the temperature.