INTRODUCTION:
If your home feels stuffy, your energy bill is creeping up, or your HVAC system seems to be working harder than usual, there’s a good chance your air filter is the culprit.
A dirty or clogged HVAC filter is the single most common cause of poor air quality and reduced system efficiency in American homes. The good news? Cleaning or replacing it is one of the easiest home maintenance tasks you can do — it takes less than 15 minutes and costs as little as $5.
In this guide we’ll walk you through exactly how to find your filter, determine whether to clean or replace it, and install a new one correctly — including the one mistake most homeowners make that actually reduces airflow instead of improving it.
H2: Why Your HVAC Filter Matters
Your HVAC filter does two important jobs. First it protects your system’s internal components — the blower motor, evaporator coil, and heat exchanger — from dust, debris, and pet hair that would otherwise coat them and cause expensive damage. Second it improves the air quality inside your home by trapping allergens, dust particles, and in some cases bacteria and mold spores.
When a filter gets clogged it can no longer do either job effectively. Airflow becomes restricted, your system has to work harder to push air through, energy consumption goes up, and components start to wear out faster. According to the US Department of Energy, replacing a clogged filter can reduce your HVAC system’s energy consumption by 5 to 15 percent.
H2: How Often Should You Replace Your HVAC Filter?
The right replacement schedule depends on your filter type and your home’s specific conditions:
Basic fiberglass filters (1 inch): Every 30 days
Standard pleated filters (1 inch): Every 60 to 90 days
High efficiency pleated filters (1 inch): Every 90 days
Thick media filters (4 to 5 inch): Every 6 to 12 months
These timelines shorten if you have pets, allergies, multiple people in the home, or if you live in a dusty area. A good rule of thumb is to check your filter every 30 days by holding it up to a light source. If you can no longer see light through it, it’s time to replace it regardless of how long it’s been installed.
H2: What You’ll Need
Before you start gather these items:
- A replacement filter in the correct size (we’ll cover how to find your size below)
- A vacuum with a brush attachment (if cleaning a reusable filter)
- Mild dish soap and water (for reusable filters only)
- A marker or pen
- A flashlight (optional but helpful)
H2: How to Find Your HVAC Filter Size
This is where many homeowners get stuck. Your filter size is usually printed on the cardboard frame of your existing filter in three numbers — length, width, and thickness. For example 20x25x1 or 16x20x4.
If the numbers on your existing filter have worn off there are two other ways to find your size. First check your HVAC system’s owner manual — the filter size is always listed there. Second measure the filter slot opening yourself with a tape measure, rounding to the nearest inch.
The most common residential HVAC filter sizes are:
- 16x20x1
- 20x20x1
- 20x25x1
- 16x25x1
- 14x20x1
Write your filter size on a piece of tape and stick it to your HVAC unit so you never have to look it up again.
H2: Step-by-Step — How to Replace Your HVAC Filter
Step 1 — Turn off your HVAC system Go to your thermostat and switch the system to off. Never replace the filter while the system is running as this can pull dust and debris directly into the unit.
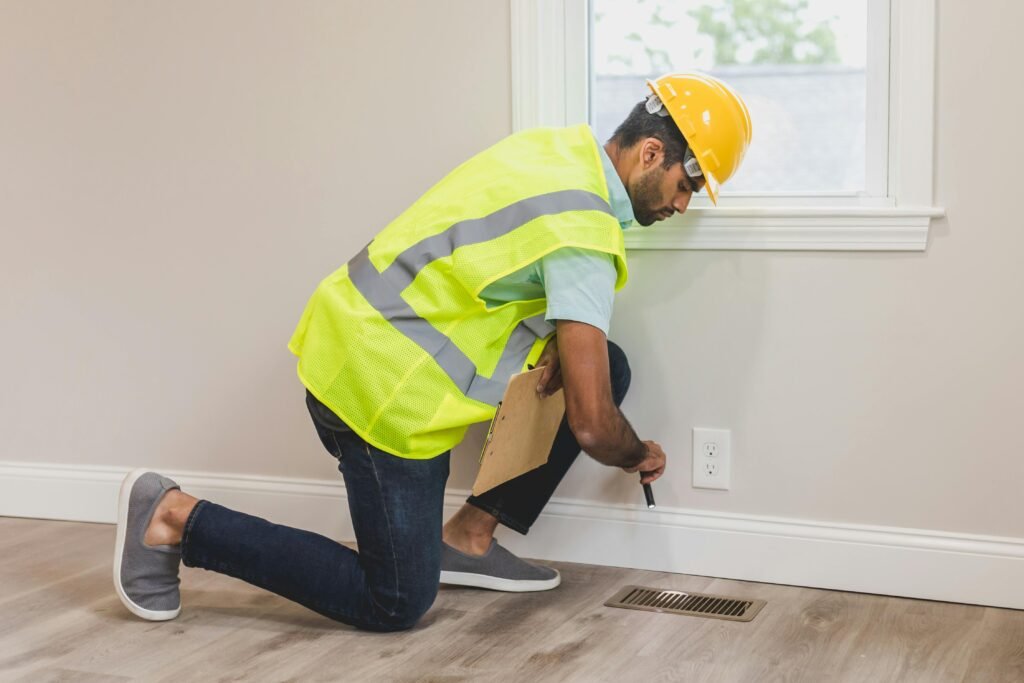
Step 2 — Locate the filter Most residential HVAC filters are located in one of three places — inside the air handler unit itself, in the return air vent on the wall or ceiling, or in a dedicated filter slot near the furnace. If you’re unsure check near the large air vent that pulls air back into the system rather than blowing it out.
Step 3 — Remove the old filter Open the filter compartment door or unscrew the vent cover. Slide the old filter out carefully — it will likely be coated in dust so move slowly to avoid shaking debris into the air. Slide it into a trash bag immediately.
Step 4 — Note the airflow direction arrow Before installing your new filter look at the cardboard frame — there will be an arrow indicating which direction air flows through it. This arrow must point toward the blower motor and away from the return air duct. Installing a filter backwards is one of the most common mistakes homeowners make and it significantly reduces your system’s efficiency.
Step 5 — Install the new filter Slide the new filter into the slot with the arrow pointing in the correct direction. It should fit snugly with no gaps around the edges. Gaps allow unfiltered air to bypass the filter entirely.
Step 6 — Close the compartment and turn the system back on Secure the filter door or replace the vent cover. Go back to your thermostat and turn the system back on. Write today’s date on the filter frame with a marker so you know exactly when to replace it next.
H2: Can You Clean and Reuse an HVAC Filter?
This depends entirely on the type of filter you have. There are two categories — disposable and reusable.
Disposable filters — the most common type — are made from fiberglass or pleated paper material. These cannot be effectively cleaned and should always be replaced. Attempting to vacuum or wash a disposable filter damages the fibers and actually reduces its ability to trap particles.
Reusable or washable filters — less common but increasingly popular — are made from a plastic or aluminum frame with a washable mesh material. These can be cleaned by removing them, vacuuming off loose debris, rinsing thoroughly with water, applying mild dish soap, rinsing again completely, and allowing them to dry fully before reinstalling. Never reinstall a damp reusable filter as this promotes mold growth inside your system.
H2: Which HVAC Filter Should You Buy?
Filters are rated using a MERV score — Minimum Efficiency Reporting Value — on a scale of 1 to 16. Higher MERV ratings trap smaller particles but also restrict more airflow.
MERV 1 to 4: Basic fiberglass filters. Cheap but only capture large particles like dust and lint. Not recommended for homes with allergy sufferers or pets.
MERV 5 to 8: Standard pleated filters. The sweet spot for most homes. Capture dust, pollen, mold spores, and pet dander. Affordable at $5 to $20 each.
MERV 9 to 12: High efficiency filters. Capture smaller particles including fine dust and some bacteria. Good for allergy sufferers. Cost $15 to $40 each.
MERV 13 to 16: Hospital grade filters. Capture the smallest particles including smoke and viruses. Only use these if your system is rated for them — they can restrict airflow in older systems and cause damage.
For most homeowners a MERV 8 pleated filter is the ideal balance of filtration quality, airflow, and cost.
H2: Signs Your Filter Needs Immediate Attention
Don’t wait for your scheduled replacement if you notice any of these warning signs:
- Your home is dustier than usual even after cleaning
- Allergy symptoms are worse indoors than outdoors
- Your HVAC system is running longer cycles than normal
- You notice a musty or stale smell when the system runs
- Your energy bill has increased without explanation
- Weak airflow from your vents
Any of these symptoms suggests your filter is overdue for replacement.
H2: Frequently Asked Questions
Q: What happens if I don’t change my HVAC filter? A clogged filter forces your system to work harder, increasing energy costs and accelerating wear on the blower motor and other components. Over time it can cause your system to overheat and shut down, or lead to expensive repairs like a frozen evaporator coil.
Q: Can a dirty filter cause my AC to stop working? Yes. A severely clogged filter can restrict airflow to the point where the evaporator coil freezes over completely, causing your AC to stop producing cold air entirely. If your AC suddenly stops cooling, check your filter before calling a technician.
Q: Is a more expensive filter always better? Not necessarily. A MERV 13 filter installed in an older system designed for MERV 8 filters can actually damage your system by over-restricting airflow. Always check your system’s manual for the maximum recommended MERV rating before upgrading.
Q: Should I buy filters in bulk? Yes — buying a multipack of filters almost always saves money and ensures you always have a replacement on hand. A 6-pack of MERV 8 filters typically costs less per filter than buying individually.
Q: Where is my HVAC filter located if I can’t find it? The three most common locations are inside the air handler near the blower, behind a large return air vent on the wall or ceiling, or in a dedicated slot in the ductwork near your furnace. If you still can’t find it, check your system’s manual or look up your model number online.